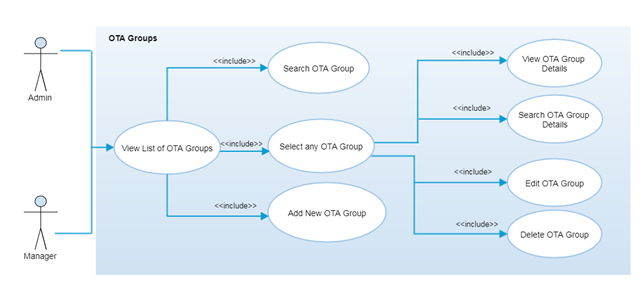
OTA Groups - Search/Listing/Add/ Edit/Delete
Overview
An OTA (Over The Air) Update allows customers to remotely update the firmware on their devices, including bug fixes and device security, over the device's life. OTA group is a group of similar kind of products for any particular product line to update the new firmware. It will be updated while next sync process.
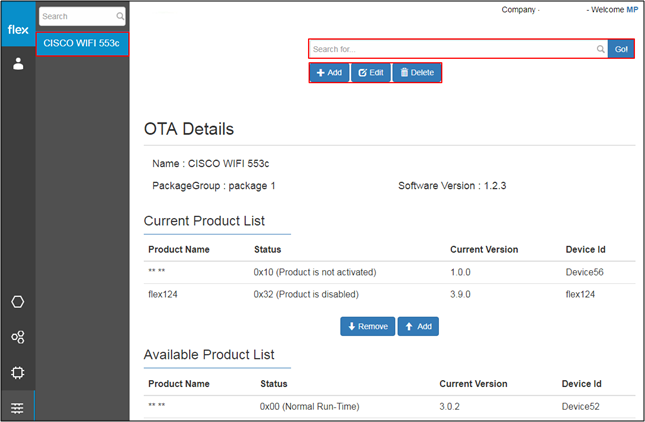
Authorized user are able to view the details of any OTA group by selecting “OTA Group Name” from the left navigation panel. Authorized users can also group products in order to send firmware updates and remove products from the groups. It is required to send firmware update to the similar kind of products.
Step-by-Step Process
Step 1 – OTA Group List
- Select the icon from the left panel for the “OTA Group”
- If there are no OTA groups added an option to add a new OTA group will be available
- If there are already added OTA groups, the user will be navigated to the OTA groups list from the left navigation panel
- Click on any OTA group from the list to view its details
- Search OTA Group:
- Users can search for any OTA group from the list of already added OTA groups
- The system can filter the list of OTA groups based on inserted keywords
- "Add" Button
- This navigates users to the “Add OTA Group” page (Refer to Step 2)
- "Edit" Button
- This navigates users to the “Edit OTA Group” page (Refer to Step 3)
- "Delete" Button
- This navigates users to the “Delete OTA Group” page (Refer to Step 4)
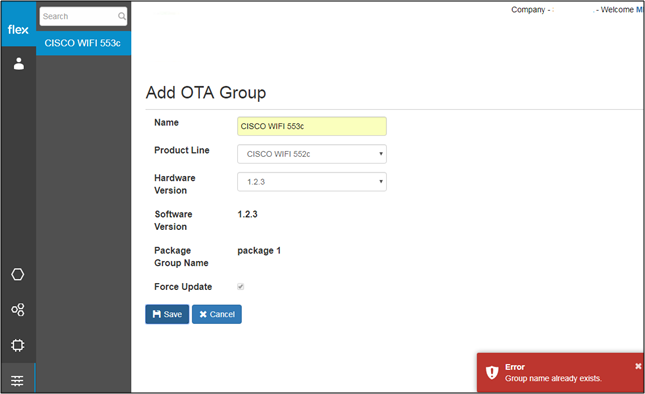
Step 2 – Add OTA Group
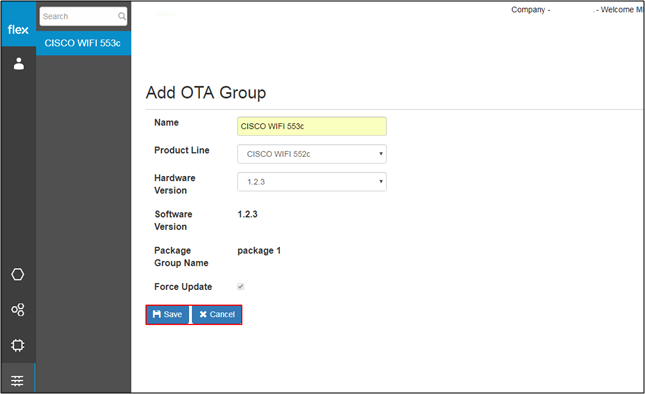
- Enter the following details to add new OTA group:
Field | Type | Required? | Description |
|---|---|---|---|
Name | Text Box | Yes | This field requires unique name for the OTA Group |
Product Line | Drop down | Yes | It requires you to select the product line from the drop down list |
Hardware Version | Drop down | Yes | It requires you to select the hardware version of the OTA group (e.g. 1.2.3) |
Software Version | Label | - | It shows the software version of the OTA group |
Package Group Name | Label | - | It shows package group name based on the above selections |
Force Update | Checkbox | - | By default, it is checked and disabled |
- Click “Cancel” to go back without saving any information
- Click the “Save” button to save the new OTA group
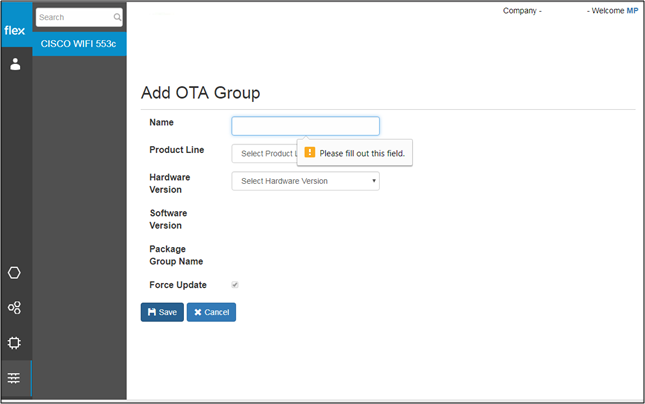
- The new OTA group information is validated after the user clicks the “Save” button
- If proper values are inserted into all required fields, the following will occur:
- The system will notify the user with a success message “OTA Group Added successfully”
- The user will be redirected to the “OTA Group List” page (Refer to Step 1)
- The user will be notified with proper error messages in the event of:
- If the user needs to enter any field level information
-
- If the group name already exists
- If the user needs to enter any field level information
Notes
- If force update is checked, once user synchronizes the products from the Agent portal, firmware will be updated automatically.
Step 3 – Edit OTA Group
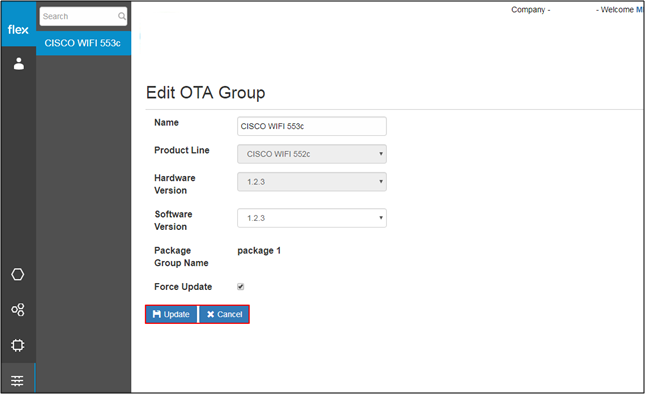
- Click the “Edit” button for any OTA group from the list
- Users can edit the following information:
- Name
- Software Version
- Package Group Name
- Click the “Update” button to save the edited OTA group details
- The system will validate the changed OTA group information and notify the user if there is an error
- Click “Cancel” to go back without editing any information.
Step 4 – Delete OTA Group
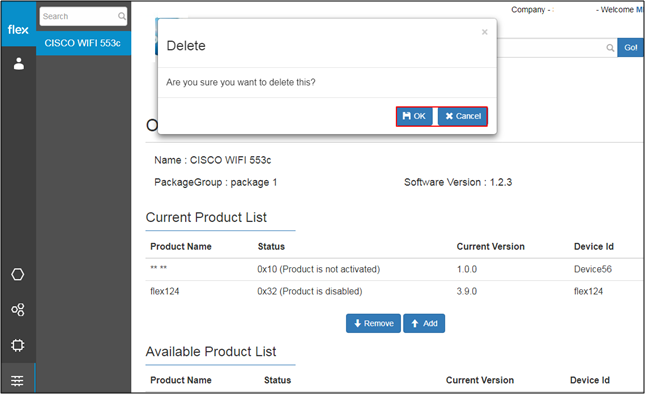
- Select any OTA group from the list and click the “Delete” button
- A pop-up opens with the confirmation message
- Click “OK” to delete the OTA group
- The OTA group will be removed from the list
- The system will notify the user (“OTA Group Deleted Successfully”).
- Click “Cancel” to go back without deleting the OTA group
- Click “OK” to delete the OTA group
- A pop-up opens with the confirmation message