Manage Tenants
Overview
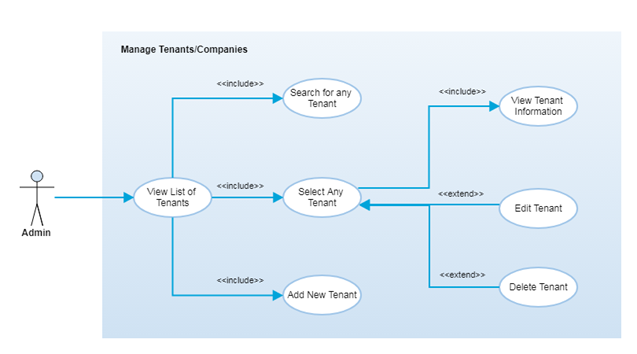
A tenant can be any company or organization irrespective of any industry who would like to subscribe the FlexConnect platform for its features and capabilities. The FlexConnect admin would add the company/tenant using this module and the tenant is ready to use the platform. From a FlexConnect system perspective, a tenant is any company with group of users who share a common access with specific privileges to the FlexConnect platform to use its capabilities. A tenant can also be referred to as a company or customer.
After a successful login and before selecting a company, Flex admin users can select the “Flex Admin User” option from left navigation panel to add, edit, delete and view tenant/company information. This option is only available to users with Flex administrative privileges. This feature is used by FlexConnect admin users to create a new tenant/company, view the list of already added tenants/companies and edit/delete the selected tenant/company as needed.
Step-by-Step Process
Step 1 – Select “Flex Admin User” from Navigation
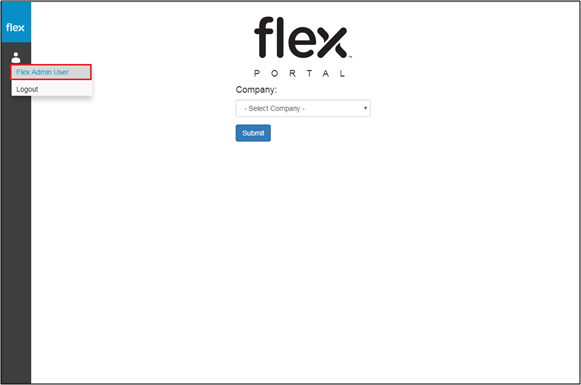
- After logging in, select the “Profile" Icon from the left navigation panel on the “Select Company" Page
- Select the “Flex Admin User” option
- Flex admin users are then redirected to the “Tenant/Company List” page. (Refer to Step 2)
Step 2 – Tenant/Company List
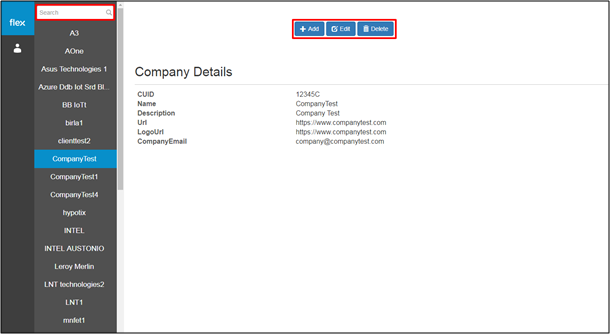
- Flex admin users can view the list of already added tenants/companies in left panel
- Search Tenant/Company
- Flex admin users can search for a specific tenant/company from the list
- Using any search keyword, the system filters the list of tenants/companies
- "Add" Button
- This navigates Flex admin users to the “Add New Tenant/Company” page (Refer to Step 3)
- "Edit" Button
- This navigates Flex admin users to the “Edit Tenant/Company” page to edit the selected tenant information (Refer to Step 5)
- "Delete" Button
- This allows Flex admin users to “Delete Tenant/Company” information. (Refer to Step 6)
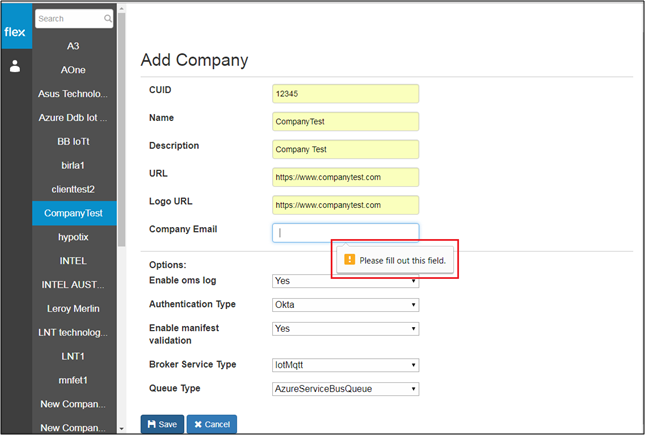
Step 3 – Add New Tenant/Company
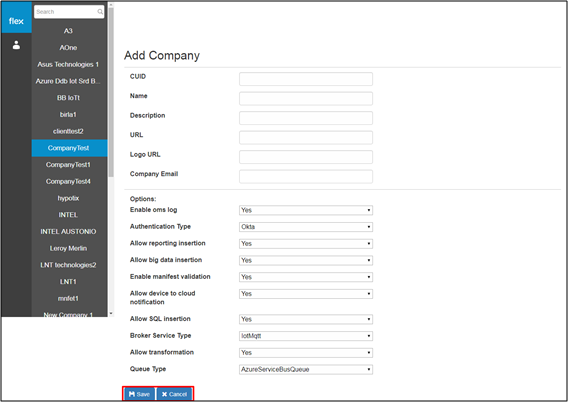
- After selecting the "Add" button, Flex admin users can enter the following information to add a new tenant:
Field | Field Type | Required? | Description |
|---|---|---|---|
CUID | Text Box | Yes | Enter the unique identifier for each new tenant. (CUID: Customer unique identifier) |
Name | Text Box | Yes | Enter the name of the tenant (It should be unique name throughout the system) |
Description | Text Box | Yes | Enter brief description regarding the tenant |
URL | Text Box | Yes | Enter the URL of tenant’s website or any other website as needed. |
Logo URL | Text Box | Yes | Enter the logo URL to upload the logo for the tenant. This logo will appear throughout all pages to users partaining to that tenant/company. |
Company Email | Text Box | Yes | Enter the unique company email for the tenant |
Enable oms log | Dropdown | No | Select Yes/No from drop-down |
Authentication Type | Dropdown
| No | Select authentication type from the below available types: - Okta - AzureAd - KeyCloak |
Allow Reporting Insertion | Dropdown | No | Select Yes/No from drop-down |
Allow Big Data Insertion | Dropdown | No | Select Yes/No from drop-down |
Enable Manifest Validation | Dropdown | No | Select Yes/No from drop-down Manifest = Package Download URL |
Allow Notification | Dropdown | No | Select Yes/No from drop-down. The selection is based on the allowance of the notification features to the tenant. |
Allow SQL Insertion | Dropdown | No | Select Yes/No from drop-down |
Broker Service Type | Dropdown | No | Select value from drop-down: - IotMqtt - RabbitMq |
Allow Transformation | Dropdown | No | Select Yes/No from drop-down |
Queue Type | Dropdown | No | Select value from drop-down: - AzureServiceBusQueue - RabbitMqQueue |
- Click on “Cancel” to go back to “Tenant/Company List” without saving new tenant/company information.
- Click the “Save” button to save the new tenant/company information
- The new tenant/company information is validated after the user clicks the “Save” button
- If proper values are inserted into all required fields, the following will occur:
- The system will notify the user with a success message “Company Added Successfully”
- The user will be redirected to the “Tenant/Company” details page (Refer to Step 4)
- If proper values are inserted into all required fields, the following will occur:
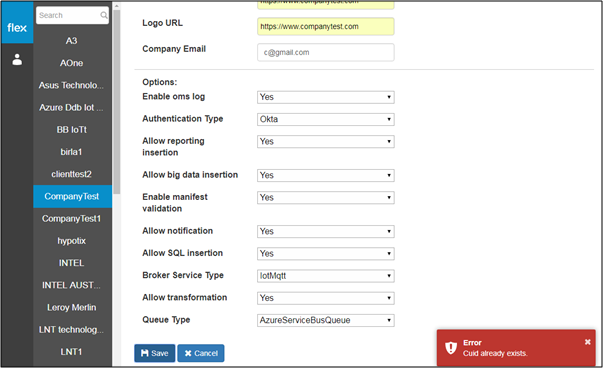
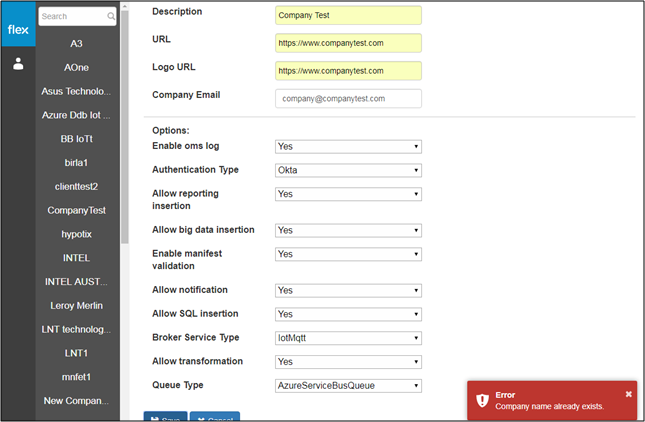
- The user will be notified with proper error messages in the event of:
- If the entered CUID already exists
- If the company name already exists
- If the user needs to enter any field level information
- If the entered CUID already exists
- The new tenant/company information is validated after the user clicks the “Save” button
Step 4 – View Tenant/Company Details
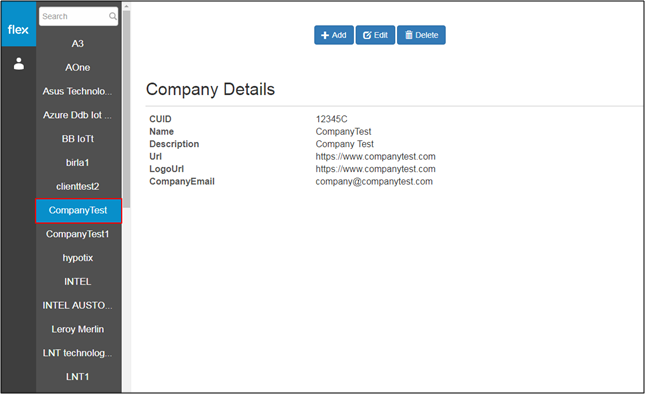
- Select any tenant/company from the list to view the following details:
- CUID
- Customer Unique ID
- Name
- Name of the tenant/company
- Description
- A brief description of the tenant/company
- URL
- The URL of the tenant/company’s website or any other relevant website
- Logo URL
- Logo URL of the tenant/company
- Company Email
- CUID
Step 5 – Edit Tenant/Company
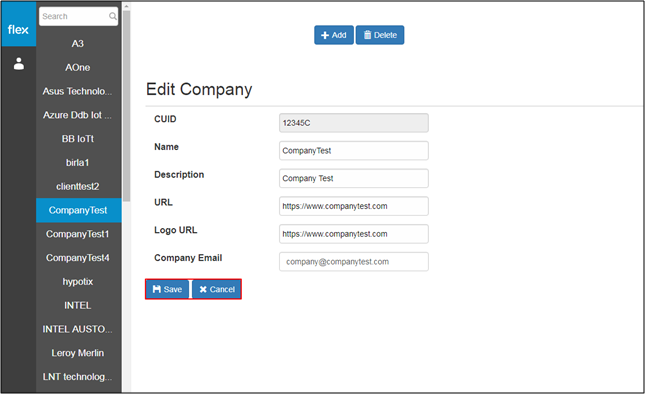
- Flex Admin users can edit the following details for the selected tenant/company:
- Name
- The name of the tenant/company
- Description
- A brief description of the tenant/company
- URL
- The URL of the tenant/company
- Logo URL
- The Logo URL of the tenant/company
- Company Email
- Name
- Click the “Save” button to save the tenant/company details
- The system will validate the updated Tenant/Company information and notify the user in case there is an error
- Click “Cancel” to go back to the "View Tenant/Company Details" page without editing any information
Step 6 – Delete Tenant/Company
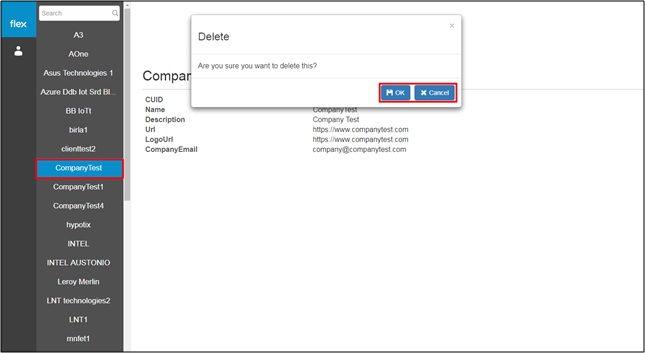
- Select any Tenant/Company from the list
- Click the “Delete” button to delete the tenant/company details
- A pop-up opens with the confirmation message
- Click “Ok” to delete the tenant/company details and to remove it from the list
- Click “Cancel” to go back to Tenant/Company Details page without deleting the selected Tenant/Company
- A pop-up opens with the confirmation message