Manage Preferences
Overview
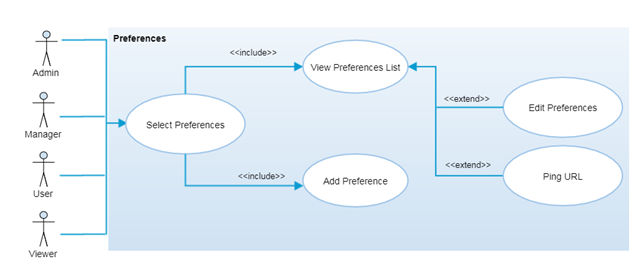
Preferences are used to define delivery method and its attribute to receive the notifications. Users will get the notifications through their preferred notification delivery system (WebSocket or WebHook) based on their defined notification templates.
After selecting the “Preferences” menu option from the left navigation panel, authorized users are able to view the preferences list and can add new preference by clicking the “Add” button. Users can set their own preferences for the notification delivery method and its attribute for receiving notifications.
Step-by-Step Process
Step 1 – View Preferences List
- Select the
 icon then the “Preferences” menu option from the left navigation menu
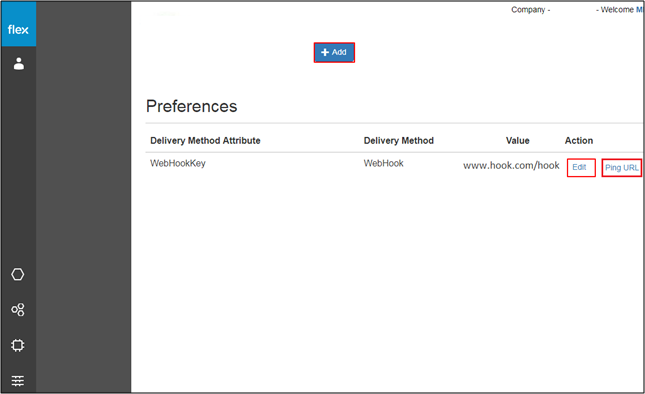
 - The preferences page contains a list of already added preferences with the following details:
- Delivery Method Attribute
- Delivery Method
- Value
- Edit
- Click “Edit” to edit the notification preference
- This navigates users to the ‘Edit Preferences” page (Refer to Step 3)
- Ping URL
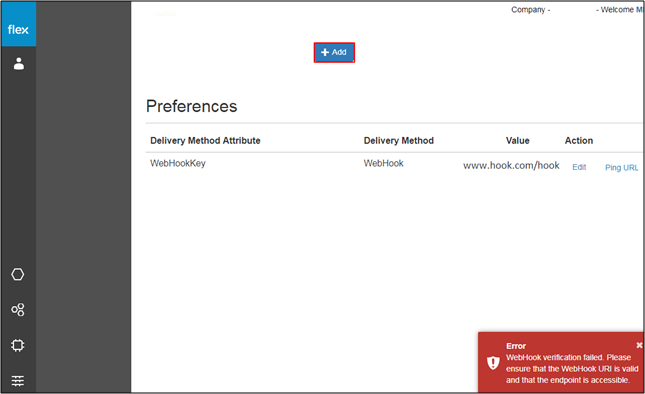
- Click “Ping URL” for WebHook/WebSocket verification
- The user will be notified with a proper error message if the WebHook/WebSocket link is invalid
- If proper values are inserted into all required fields, the system will notify the user with a success message
- The user will be notified with a proper error message if the WebHook/WebSocket link is invalid
- Click the “Add” button to add a new preference
- This navigates users to the ‘Add Preference” page (Refer to Step 2)
- Click “Ping URL” for WebHook/WebSocket verification
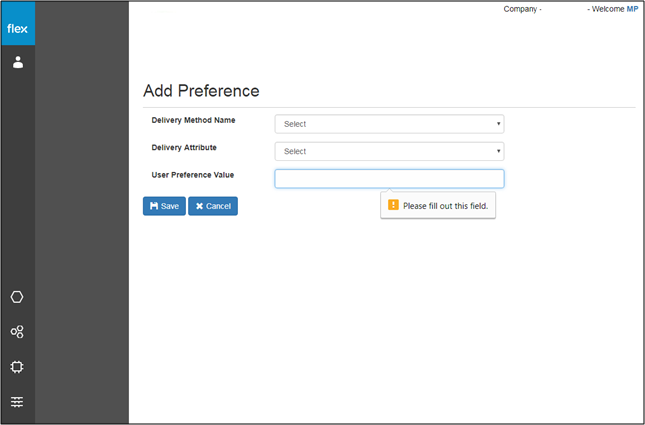
Step 2 – Add Preference
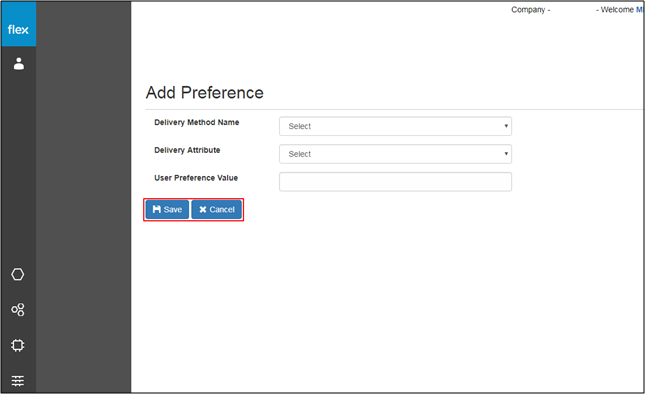
- Enter the following details to add new preference:
Field | Type | Required? | Description |
|---|---|---|---|
Delivery Method Name | Drop Down | Yes | This field requires to select delivery method |
Delivery Attribute | Drop Down | Yes | This field requires to select delivery attribute from below options: - WebHookKey - WebUrl - Token |
User Preference Value | Text Box | Yes | It requires you to enter the corresponding value of selected delivery attribute |
- Click the “Cancel” button to go back without saving any information
- Click the “Save” button to save the new preference
- The new preference information is validated after the user clicks the “Save” button
- If proper values are inserted into all required fields, the following will occur:
- The system will notify the user with a success message
- The user will be notified with a proper error message in the event of:
- If the user needs to enter any field level information
Step 3 – Edit Preferences
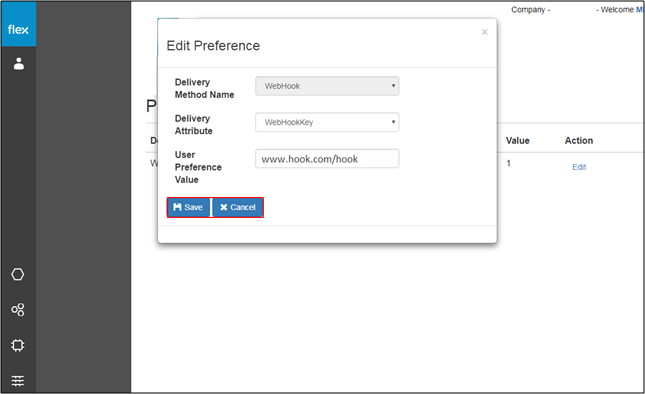
- Click the “Edit” button for any preference from the “View Preferences” List
- Users will be able to edit the following details:
- Delivery Attribute
- User Preference Value
- Click the “Save” button to save the edited preference details
- System will check for the validation and notify user in case of any error
- Click “Cancel” to go back without editing any information