Manage Virtual Products
Overview
The virtual product is not physical in nature but can be used to represent a physical product using a unique virtual ID. Virtual products are useful for transferring product configurations and endpoint details from an old product to a replacement product iif the original product is needs to be replaced for any reason (stolen, lost, damaged, etc.)
User can assign a virtual ID to the product either at the time of importing the product or after the product is already imported. By associating a virtual product with each product, users can keep track of old and new data and prevent the loss of data generated by previous device/s. Only one virtual product can be associated with one product at a time. Authorized users can select any product line and can click on “Virtual Products” tab to view, add, edit and delete the virtual products.
If there is any product failure, when the new product of the same product line or configuration is added the user can associate the old product’s virtual ID with this new replacement product so that it will transfer the entire configuration and endpoints to this new product along with its data history.
Step-by-Step Process
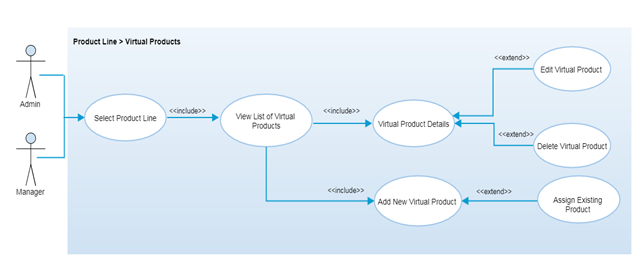
Step 1 – View Virtual Products
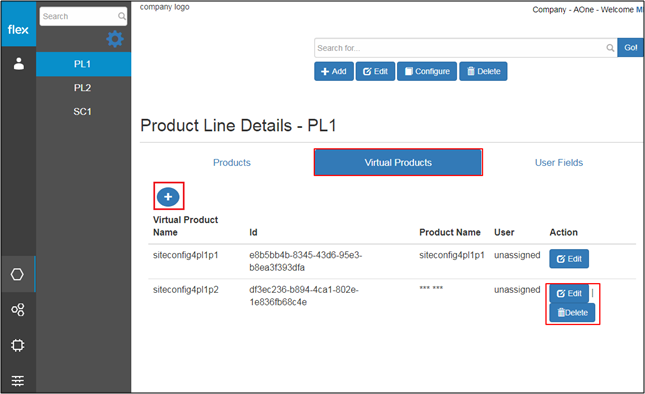
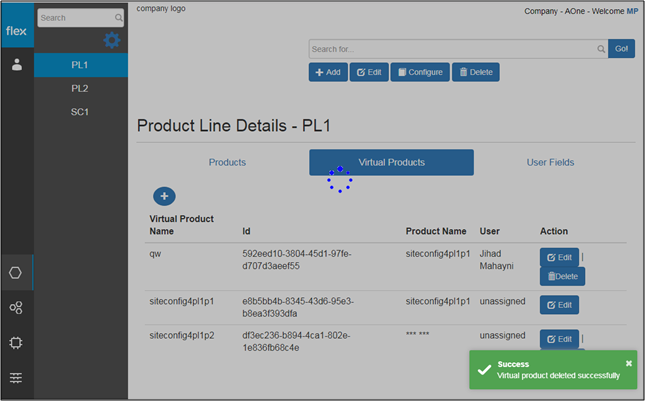
- Select any product line from the list and click on “Virtual Products” tab
- This shows the list of virtual products added for that product line with the following details:
- Virtual product name
- Id
- Unique ID
- Associated Product Name
- User name
- Edit
- This navigates user to the “Edit Virtual Product” page (Refer to Step 3)
- Delete
- It navigates user to the “Delete Virtual Product” page (Refer to Step 4)
- Click the “+” button to add new virtual product
- This navigates users to the “Add Virtual Product" page (Refer to Step 2)
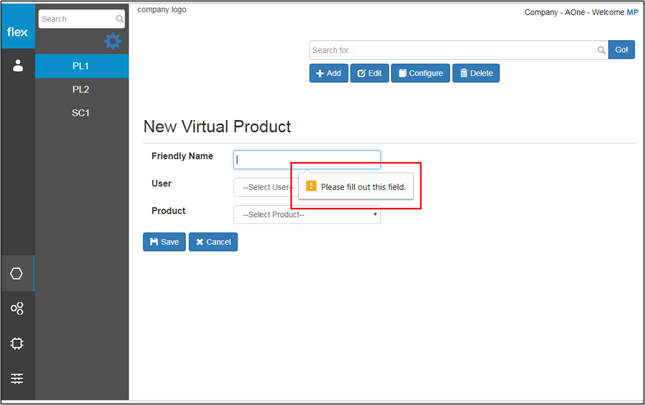
Step 2 – Add Virtual Product
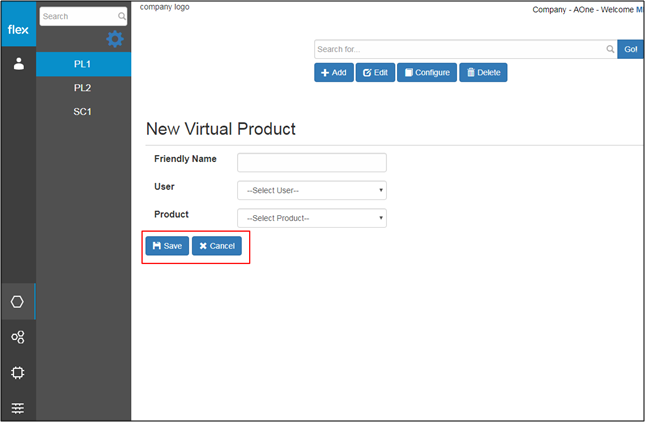
- Enter the following details to add new virtual product:
Field | Type | Required? | Description |
|---|---|---|---|
Friendly Name | Text Box | Yes | This field requires unique friendly name for the virtual product |
User | Dropdown | Yes | It requires you to select the user from the drop down list |
Product | Dropdown | Yes | It requires you to select the product from the drop down list. Drop down will contain list of all the active products so that user can assign this newly added virtual product to the existing active product. |
- Click “Cancel” to go back to “Virtual Products” page without saving any information
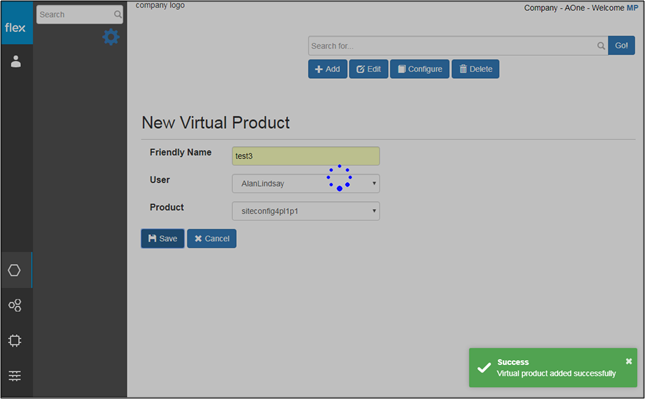
- Click the “Save” button to save the new product line
- The new user field information is validated
- If proper values are inserted into all required fields, the following will occur:
- The system will notify the user with a success message (“Virtual product Added successfully”) and will redirect the user to the “Virtual Products” page
- The user will be notified with proper error messages (will appear in the bottom right-hand corner of the screen) in the event of:
- If the user needs to enter any field level information
Step 3 – Edit Virtual Product
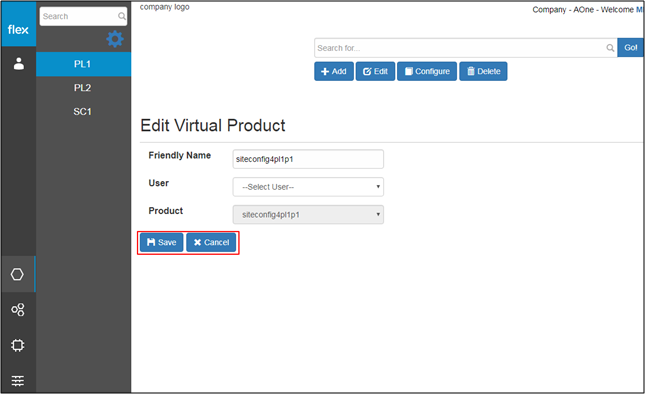
- Users can edit the following details of the selected virtual product:
- Friendly Name
- This field requires unique friendly name for the virtual product
- User
- Select the user from the drop down list
- Product
- Select the product from the drop down list
- Friendly Name
- Click the “Save” button to save the edited virtual product
- The system will validate the information and notify the user if there is any error
- Click “Cancel” to go back without editing any information
Step 4 – Delete Virtual Product
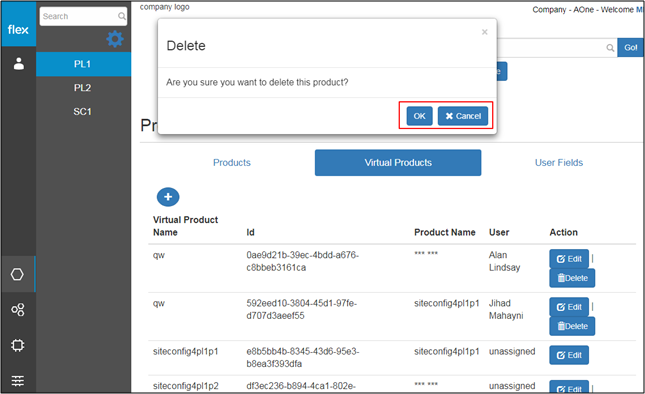
- Click the “Delete” button to delete any virtual product details
- This opens a pop-up with a confirmation message
- Click “Cancel” to go back to the “Virtual Products” page without deleting the virtual product from the list
- Click “OK” to delete the virtual product details and remove it from the list.
- The system will notify the user with the following success message
- This opens a pop-up with a confirmation message