Manage Product / Endpoint Definitions
Overview
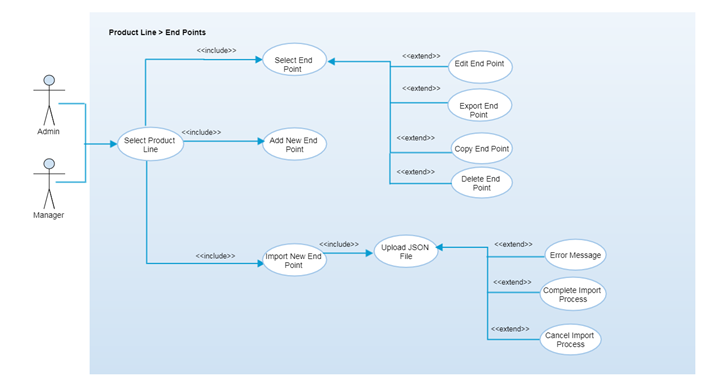
An endpoint is any hardware device that can be used to measure some aspect of the real world. Common types of data collected by the endpoints are temperatures, GPS coordinates, humidity, air pressure, etc. With the help of endpoint definitions, users will be able to configure when and which kinds of data they require from the endpoints.
After a successful login, authorized users are able to add the endpoint definition for any particular product line. To add endpoint definition, the authorized user needs to select product line, click on the “Configure” button, and then the “Add” button to add any endpoint definition under that product line. After logging in, and once the product line has been created, users will be able to add/edit/delete the endpoint definitions for each particular product line.
Step-by-Step Process
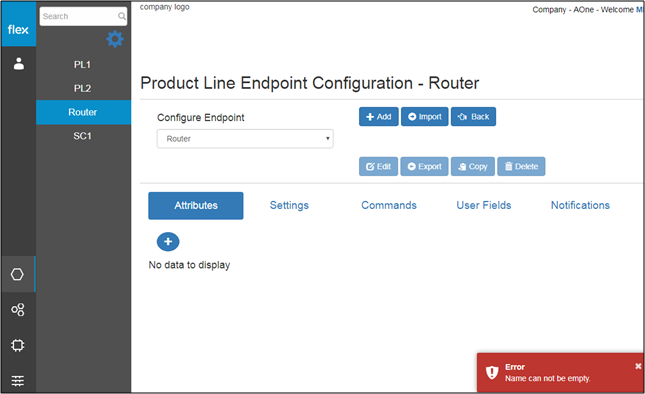
Step 1 – View Product Line Endpoints
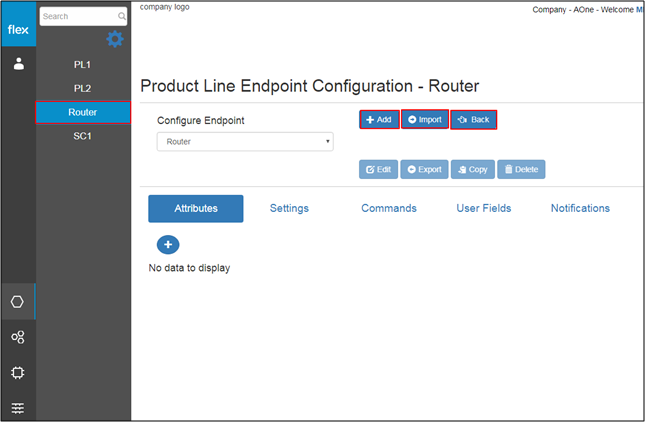
- Users can configure Endpoints using the following options:
- "Add" Button
- The user has to add the Endpoint definition before being able to configure the Endpoint
- This prompts users to the “Add Endpoint Definition” pop-up (Refer to Step 2)
- "Import" Button
- This prompts users to the “Import Endpoint Definition” pop-up (Refer to Step 3)
- "Back" Button
- This navigate users to the “View Product Line Details” page
- "Add" Button
Step 2 – Add Endpoints Definition
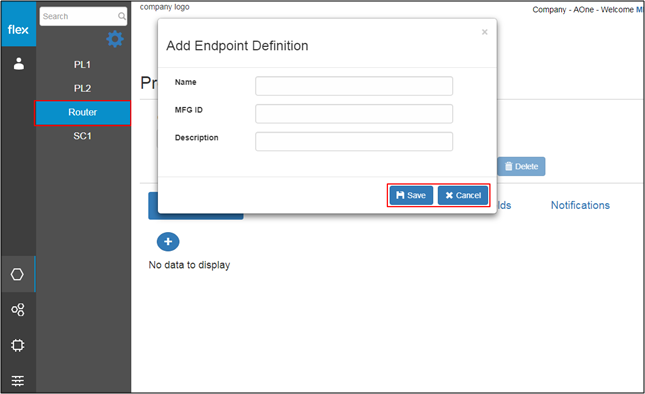
Precondition: Selecting the "Add" button on the Product Line Endpoints Configuration page
- Users can enter the follwoing information in the subsequent pop-up box:
- Name
- This field is required
- The user can enter the unique name for the endpoint into this text box
- MFG ID (Manufacturer Identity)
- This field is required
- The user can enter the manufacturer ID for the dynamic endpoint into this text box
- Description
- This field is not required
- The user can enter a brief description of the endpoint
- Name
- The “Cancel” button redirects users back to the “Product Line - Endpoints” page without saving any information
- Users click the “Save” button to save the new endpoint definition
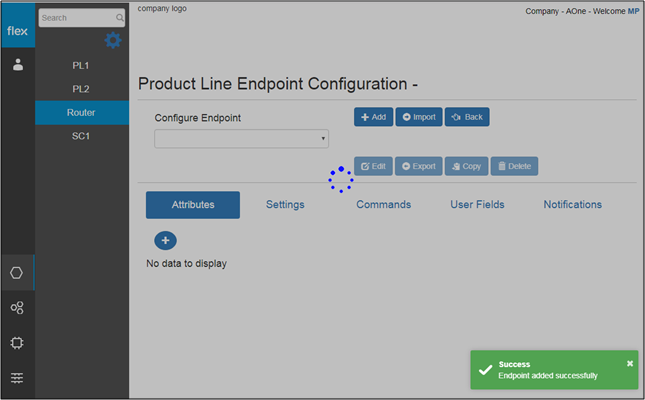
- The new product line information is validated after the user clicks the “Save” button
- If proper values are inserted into all required fields, the following will occur:
- The system will notify the user with a success message (will appear in the bottom right-hand corner of the screen) “Product Line Added Successfully”
- User can see the added endpoint in to the “Configure Endpoint” drop down
- The user will be notified with proper error messages (will appear in the bottom right-hand corner of the screen) in the event of:
- If the user needs to enter any field level information
- If the user needs to enter any field level information
Step 3 – Import Endpoints Definition
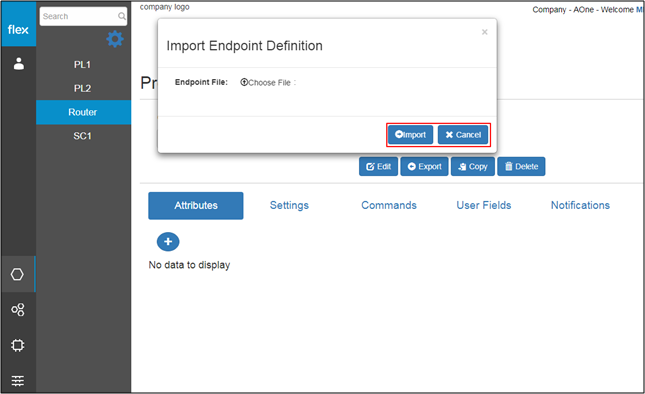
Precondition: Selecting the "Import" button on the Product Line Endpoints Configuration page
- By selecting the “Choose File” option, users can upload their files to the portal
- The user can only import files that are in the JSON format
- The user then selects JSON files from their local device
- If other than JSON file has been selected then system will notify user with the error message. (“Invalid File”).
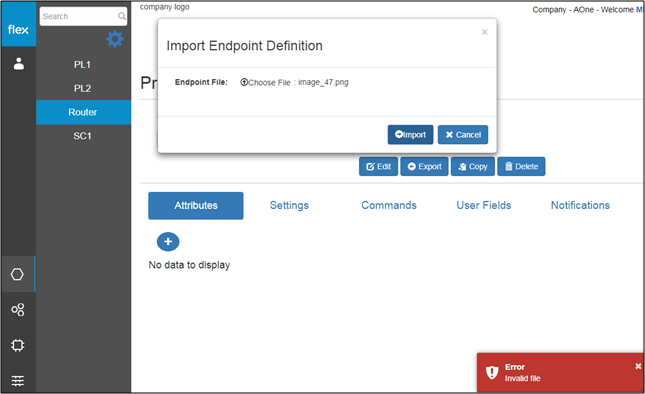
- If other than JSON file has been selected then system will notify user with the error message. (“Invalid File”).
- Selecting the “Cancel” button will navigate the Product Line Endpoints Configuration page without saving any files
- By selecting the “Import” button, the user completes the Endpoint import
- Once this occurs, the user will be able to see the added endpoint in to the “Configure Endpoint” drop down
Step 4 – Endpoints List
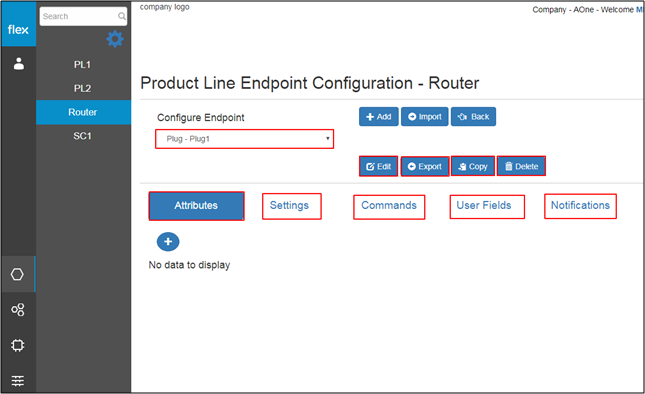
- By selecing the “Configure Endpoint” drop down, the user can view all the added Endpoints for the selected product line
- After selecting a particular endpoint from the drop down list, users will have the following options:
- "Edit" Button
- This navigates the user to the “Edit Endpoint Definition” page (Refer to Step 5)
- "Export" Button
- This navigates the user to the “Export Endpoint” page (Refer to Step 5)
- "Copy" Button
- This can be used to create a copy of the selected endpoint definition
- "Delete" Button
- This navigates the user to the “Delete Endpoint Definition” page (Refer to Step 6)
- "Edit" Button
Step 5 – Edit Endpoints Definition
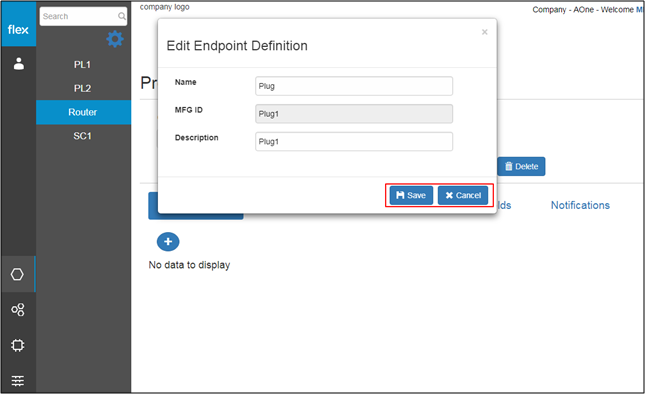
Precondition: Selecting the Edit button on the Product Line Endpoints Configuration page
- User can edit the following details of the selected endpoint:
- Name
- Description
- By clicking on the “Cancel” button, users can to go back without modifying any information
- By clicking on the “Save” button, users can save any changes made to the endpoint
- The new Endpoint definition information is validated after the user clicks the “Save” button
- Errors?
Step 6 – Delete Endpoints Definition
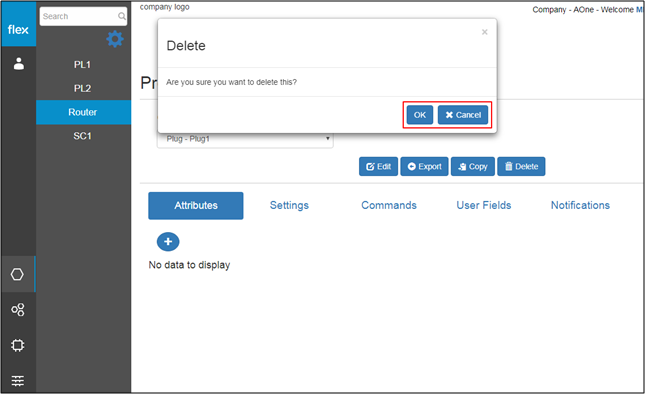
Precondition: Selecting the Delete button on the Product Line Endpoints Configuration page
- When users click the “Delete” button, they will be able to delete endpoint definitions
- A pop-up confirmation message will appear
- Click on “OK” to delete the selected endpoint. It will be deleted from the drop down list.
- By clicking on the “Cancel” button, users can to go back without deleting the endpoint
- By clicking on the “OK" button, users can delete the selected the endpoint
- The endpoint will be removed from the “Configure Endpoint” drop down list
- A pop-up confirmation message will appear