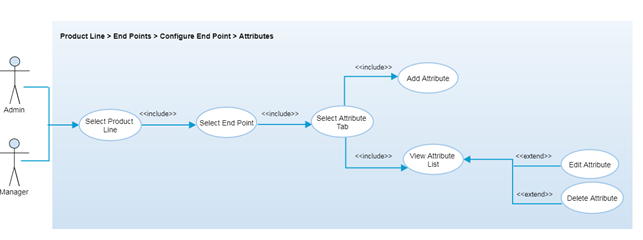
Configure Product/Endpoint - Attributes
Overview
An attribute is the specification that defines the property of any product or device. It can be considered metadata for the products. It is read only field of any device/endpoint.
Authorized users are able to select the configure endpoint option for any product line and can consequently add, edit, or delete the attributes for that particular endpoint from the Attributes tab.
Once the endpoint of any product line is created, authorized user can add attributes for that particular endpoint. It is required to add the attributes so that endpoint can be able to send the attributes data to the system.
Step-by-Step Process
Step 1 – Endpoints Attributes
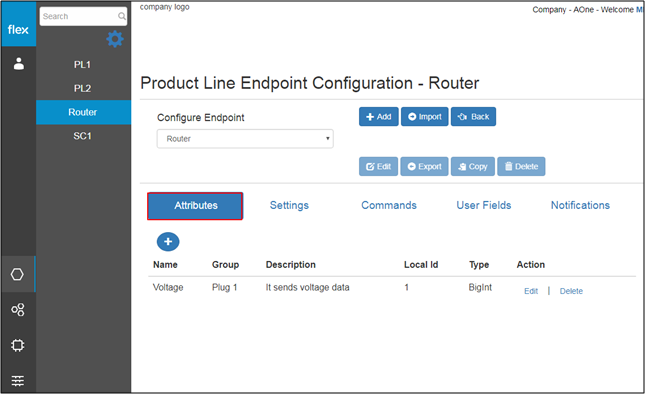
- Select any endpoint from the “Configure Endpoint” drop down list
- The "Attributes" tab will contain a list of attributes that have already been added
- This tab lists the following attribute details:
- Name
- Group
- Description
- Local Id
- Type
- Action
- Edit
- Selecting 'Edit' prompts users to the “Edit Attributes” pop-up (Refer to Step 3)
- Delete
- Selecting 'Delete' prompts users to the “Delete Attributes” pop-up (Refer to Step 4)
- Edit
- Users can click on the “+” button to add new attribute
- Selecting '+' prompts users to the “Add Attributes” pop-up (Refer to Step 2)
Step 2 – Add Attributes

Precondition: Selecting the "Add" button on the Product Line Endpoints Configuration page
- Users can enter the following information in the subsequent pop-up box:
Field | Type | Required? | Description |
|---|---|---|---|
Name | Text Box | Yes | This field requires unique name for the attribute values |
Group Name | Text Box | Yes | This filed requires group name for the attribute |
Description | Text Box | No | Brief description about the attribute values |
Data Type | Drop Down | Yes | It requires to select the data type for the attribute |
Local ID | Text Box –unique identifier | Yes | It requires Local ID as unique identifier for the attribute value |
- If any data type except “Boolean” is selected then users will get an option to add attribute constraints as below:
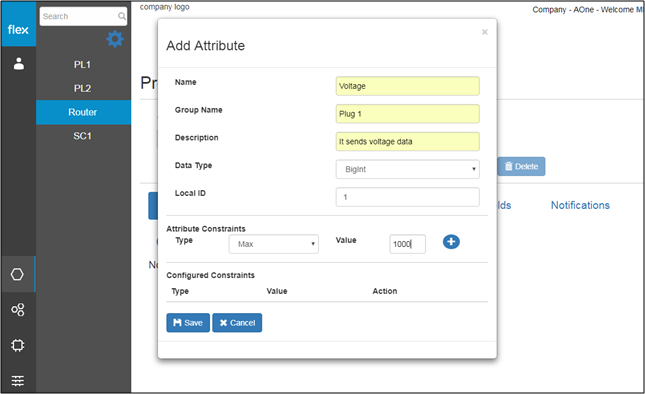
Field | Type | Required? | Description |
|---|---|---|---|
Attribute Constraints Type | Drop Down | Yes | This field requires attribute constraints type. Drop down will contain below values: - Max - Negative - Min - Positive |
Value | Text Box | No | This filed requires value of selected attribute constraints. In case of negative and positive constraints, no need to select the value. |
- Edit Constraints
- To edit the value of constraint, click on edit button
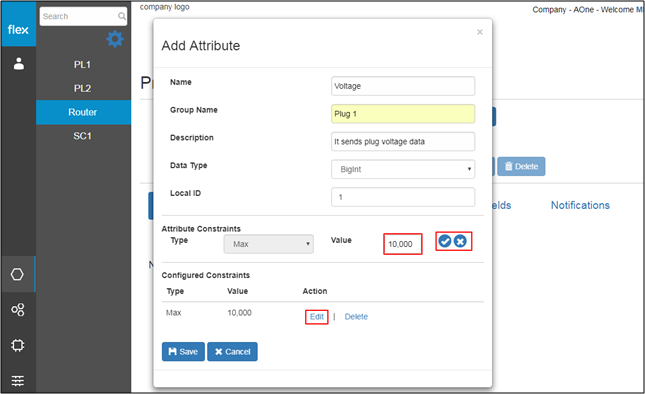
- Click on “True Icon” to save the edited values
- Click on “Cancel icon” to cancel the updates
- Delete Constraints
- Click on delete button to delete the constraints
- Click on “Save” button to save the new attribute data
- Click on “Cancel” to go back to “End Point Attributes” page without saving attribute details
- It checks for the below validations while saving the information and notifies user with proper error message
- In case of field level validation
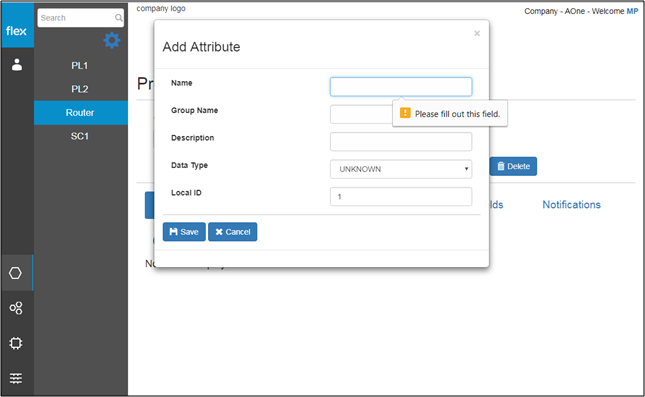
- In case of field level validation
- In case of max value smaller than min value
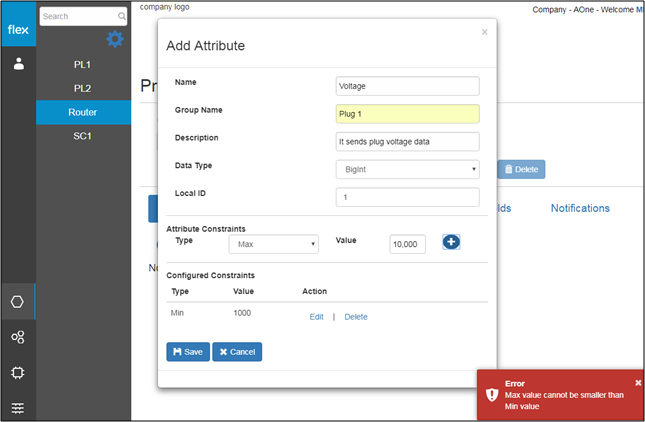
- In case of max value smaller than min value
- In case of when user adds positive and negative both values for the attribute
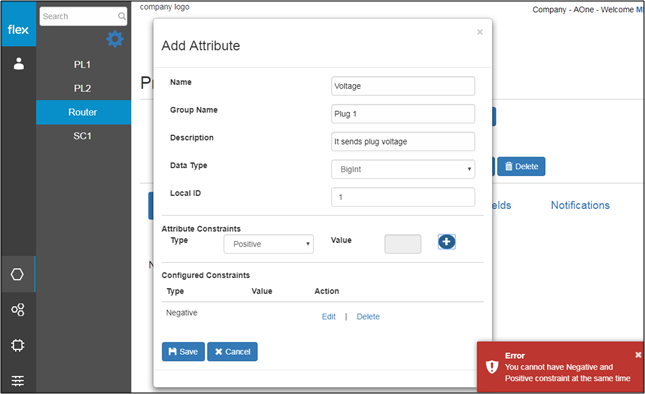
- In case of when user adds positive and negative both values for the attribute
- In case of duplicate name
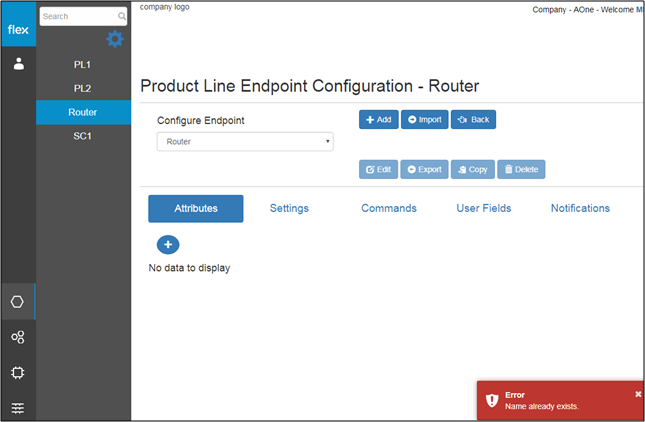
- In case of duplicate name
- In case of duplicate local id
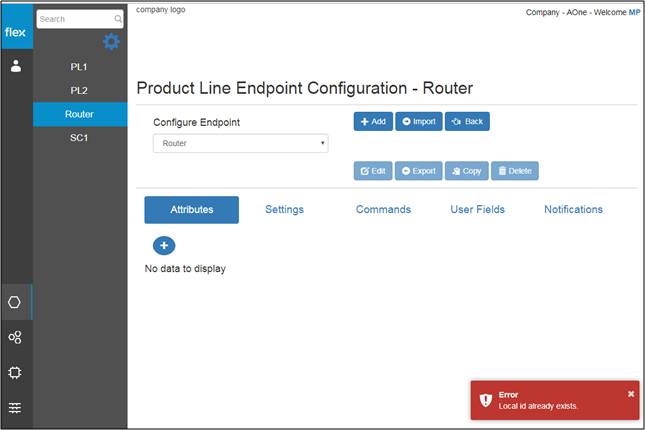
- In case of duplicate local id
Step 3 – Edit Attributes
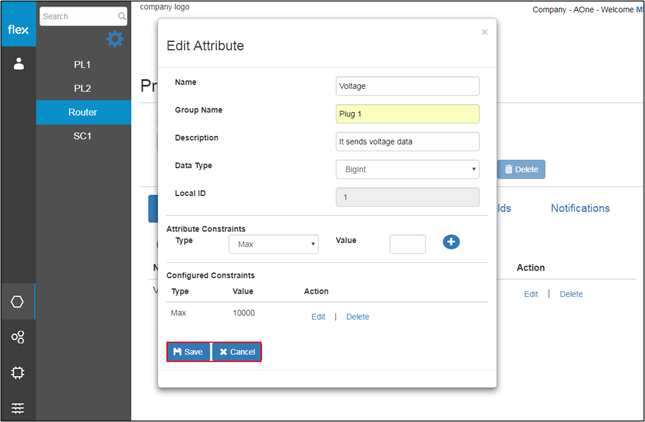
- Click on “Edit” button for any attribute from the “Endpoint Attributes” list. Users will be able to edit below details:
- Name
- Group Name
- Description
- Data Type
- Local ID
- Attribute constraints type
- Attribute constraints value
- Click on “Save” button to save the attribute details
- System will check for the validation and notify users in case of any error
- Click on “Cancel” to go back to “Endpoint Attributes” page without editing any information
Step 4 – Delete Attributes
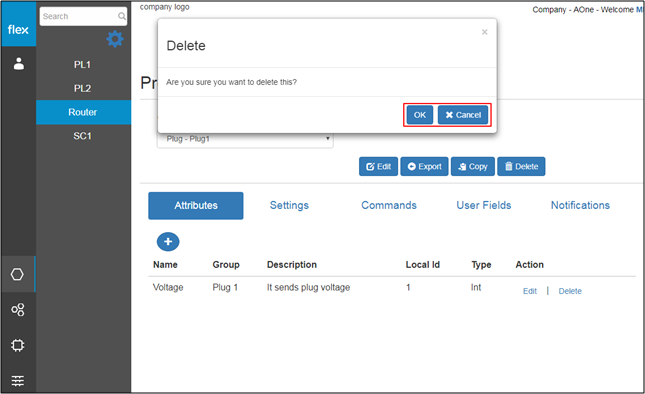
- Click on “Delete” button of any particular attribute to delete its details
- This will open a pop-up with confirmation message
- Click on “OK” to delete the attribute details, and it will subsequently be deleted from the Attributes list
- Click on “Cancel” to go back to “Endpoint Attributes” page without deleting the attribute
- This will open a pop-up with confirmation message