Configure Product/EndPoint – User Fields
Overview
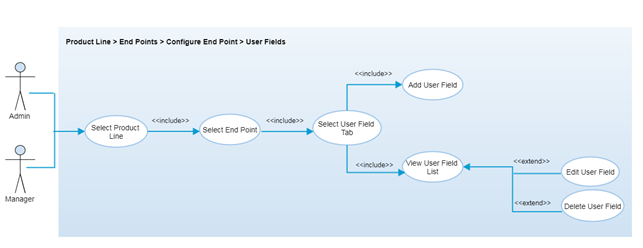
User fields are the additional information about the product which can be used to describe the product. Authorized user can add/edit these additional values for each product when required. The main purpose to define these user fields are that user can add additional details/additional fields about any particular product as and when required. User fields are generic to all the products of any product line.
After selecting any product from a product line, authorized users can select the "User Fields" tab to view the list of user fields and manage (add / edit) the user fields’ values.
Step-by-Step Process
Step 1 – Endpoint User Fields
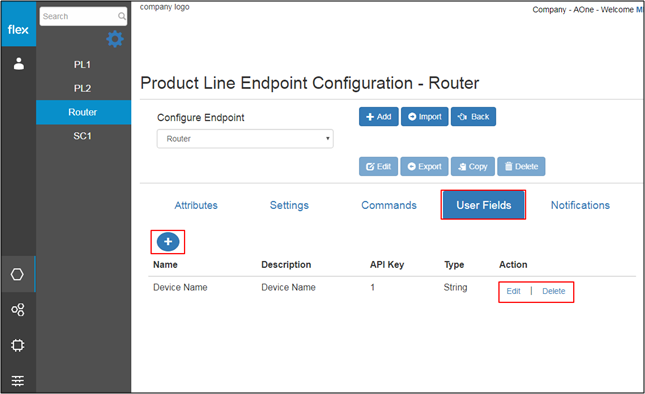
- Select any endpoint from the “Configure Endpoint” drop down
- By clicking on “User Fields” tab, the user can see the list of added user fields with the following details:
- Name
- Unique name for the user field
- Description
- Brief description about the user field
- API Key
- API key associated with the user field
- Type
- Data type of the user field
- Edit
- This navigates users to “Edit User Field’ (Refer to Step 3)
- Delete
- This allows uses to “Delete User Field”. (Refer to Step 4)
- Name
- Click the “+” button to add a new user field
- This navigates users to “Add New User Field’ (Refer to Step 2)
Step 2 – Add New User Field
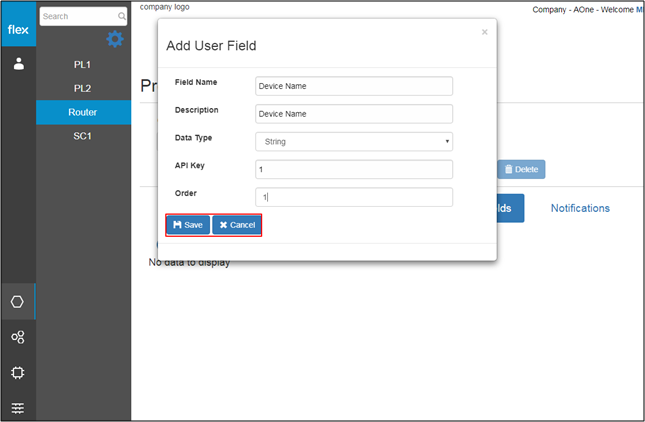
- Enter the following details to add new user field:
Field | Type | Required? | Description |
|---|---|---|---|
Field Name | Text Box | Yes | This field requires unique name for the user field |
Description | Text Box | No | Brief description about the user field values |
Data Type | Drop Down |
| User needs to select the data type associated with the user field |
API Key | Text Box | Yes | It requires API key associated with the user field |
Order | Text Box | Yes | It requires to enter order number |
- Click the “Cancel” button to go back to the “Endpoint User Fields” page without saving any information
- Click the “Save” button to save the new user field
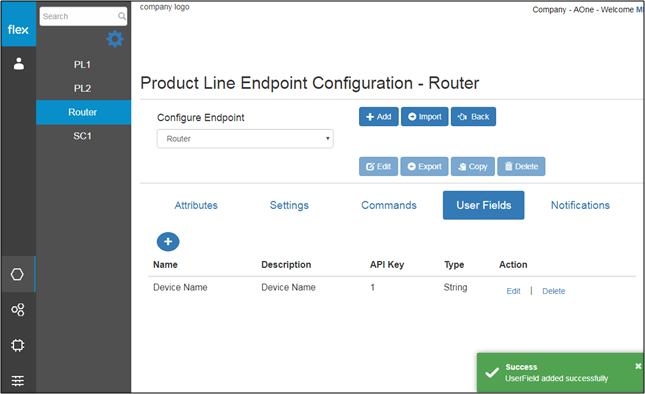
- The new user field information is validated
- If proper values are inserted into all required fields, the following will occur:
- The system will notify users with a success message. (“User field Added successfully”) and will redirect users to the “Endpoint User Fields” page
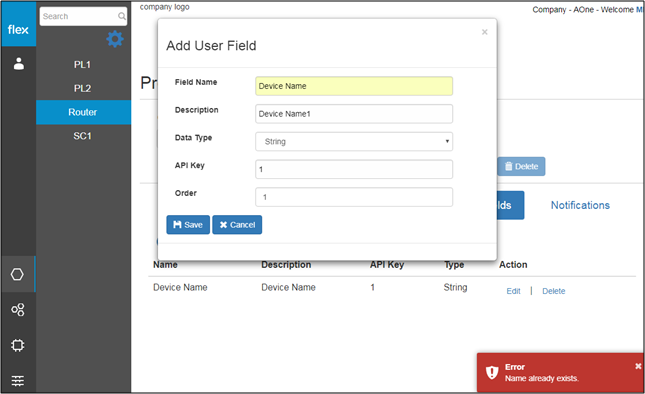
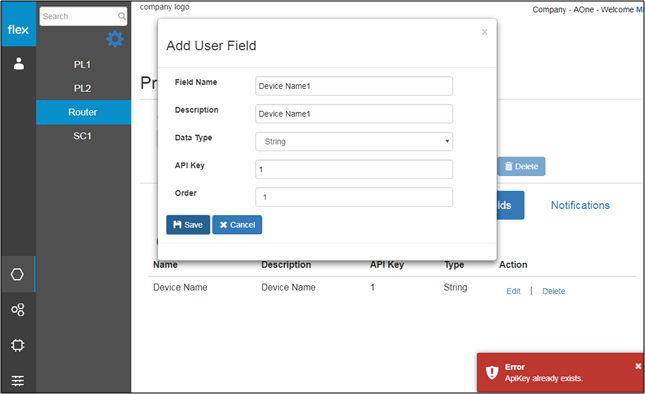
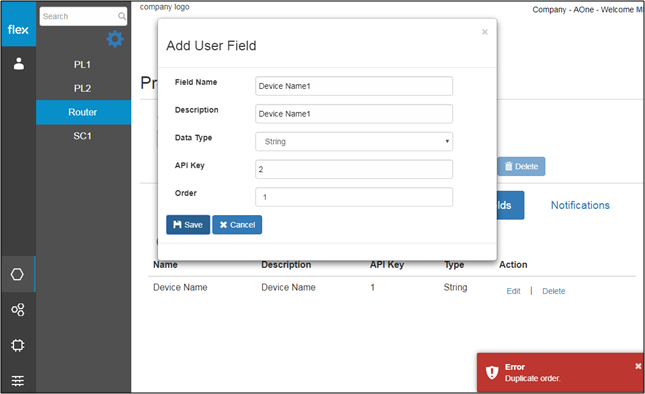
- The user will be notified with proper error messages (will appear in the bottom right-hand corner of the screen) in the event of:.
- If the user needs to enter any field level information

- If the user enters a duplicate field name
- If the user enters a duplicate API key
- If the user enters a duplicate order
- If the user needs to enter any field level information
Step 3 – Edit User Field
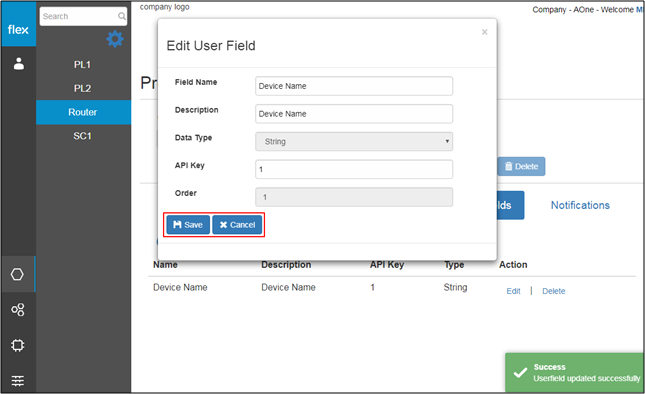
- User can edit the following details by clicking on “Edit” button for any particular user field from the list:
- Field Name
- Name of the user field
- Description
- Brief description of the user field
- API key
- Field Name
- Click the “Save” button to save the edited user field values
- The system validates the changed user field information and notifies the user if there is any error
- Click the “Cancel” button to go back without editing any information
Step 4 – Delete User Field
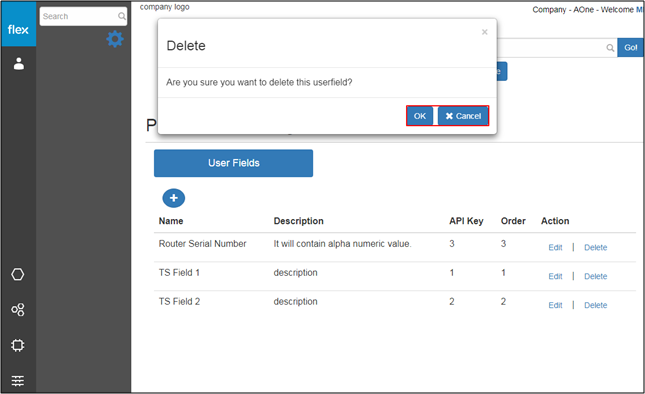
- Click on “Delete” button of any particular user field from the list
- This opens a pop-up with confirmation message
- Click “OK” to delete the user field, which will then be deleted from the list
- Click “Cancel” to go back without deleting the user field
- This opens a pop-up with confirmation message