Add (Import) Product
Overview
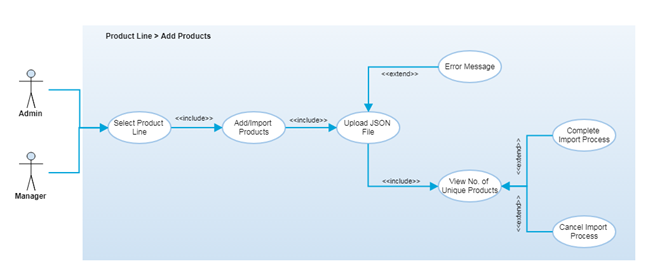
After a successful login, authorized users can add products to any selected product line by importing a JSON file. Users can only import products that the JSON file format. JSON file is supposed to be shared by Flex to its customer for product data entry.
It requires to add product/actual device in specific product line so that after product activation it can translate and communicate data & activity from native hardware.
Step-by-Step Process
Step 1 – Select Product Line & View Products
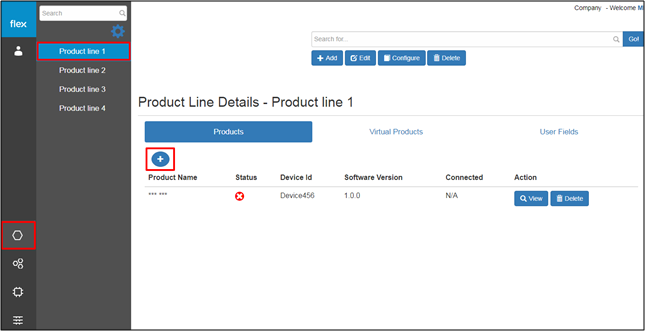
- Select a product line from the list of already added product lines from the left navigation panel
- The products tab is
- Click the “+” icon in the “Products” tab, which will redirect users to the “Add Products” page (Refer to Step 2)
Step 2 – Add Product (JSON) File

- Click on the “Choose Product File” icon to upload a file
- This allows users to select the JSON file from their local device
Notes
- Users can only upload products that are in JSON format.
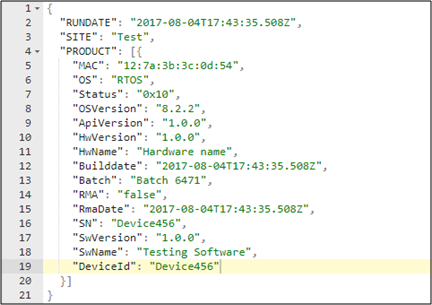
- JSON files contain data structures and objects in a standard data interchange format that is lightweight, text-based and human readable. JSON files are considered a language independent format.
- Product JSON files must contain unique serial numbers and device IDs for each product.
- Any technical person or device manufacturer can create JSON files for products per the product schema.
- Review a Sample JSON File Format below:
Step 3 – Import Product (JSON) File
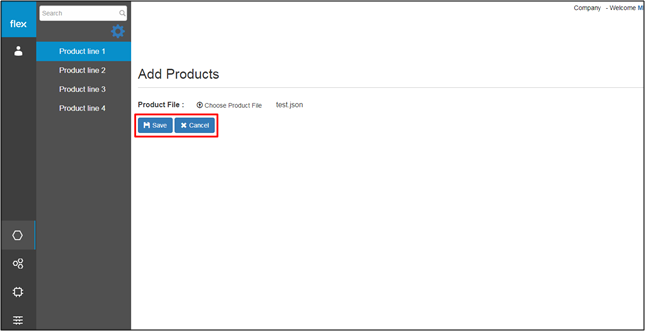
- After selecting the JSON file from their local device, users can either save the file as a new product or cancel the import process
- Click “Cancel” to cancel the import process and which will redirect users back to the “Product Line” page
- Click the “Save” button to import the product
- The new product information is validated after the user clicks the “Save” button
- If proper values are inserted into all required fields, the following will occur:
- The system will notify the user with a success message “Product imported successfully” (refer to Step 4)
- The user will be notified with proper error messages in the event of:
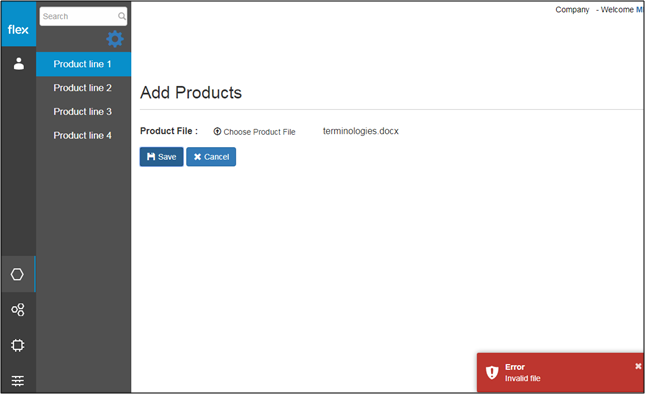
- If the user selects a file format that is not JSON (“Invalid File”)
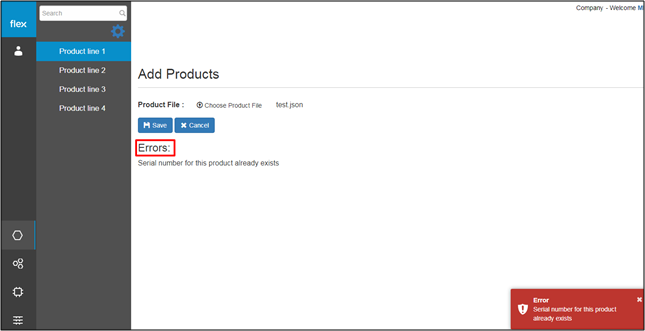
- If the user uploads a JSON file that contains duplicate data (“Serial number for any product already exists”)
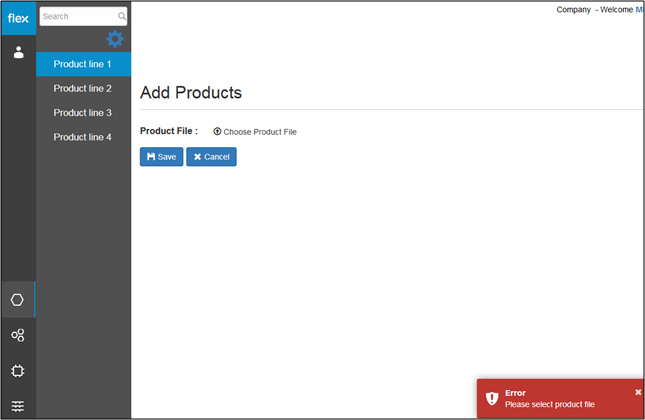
- If the user clicks the “Save” button without selecting any file
- If the user selects a file format that is not JSON (“Invalid File”)
Step 4 – Confirm/Cancel Import
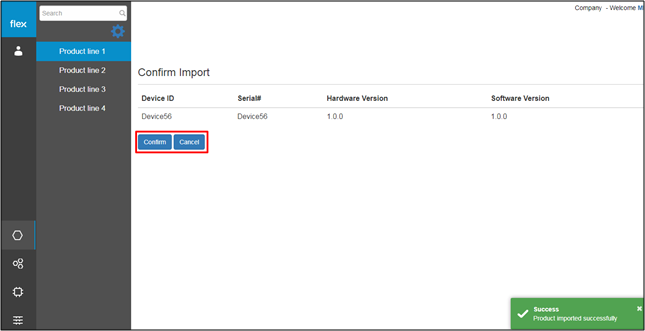
- After a successful import, the user can view the list of imported products with below details:
- Device ID
- Must be unique for each product/device
- Serial Number
- Must be unique for each product/device
- Hardware Version
- Software Version
- Device ID
- Click the “Confirm” button to confirm the importation of the listed products
- The system will redirect users back to the “Product Line” page after saving the product's information
- Click “Cancel” to cancel the import process
- The system will redirect users back to the “Product Line” page without saving the product's information
Step 5 – View Imported Products

- After recieving the import confirmation, users will be redirected to the selected “Product Line” page where they will be able to view the full list of products (including newly imported and those already available)
- The user can view the following details of each product in the product line:
- Product Name
- Click the down arrow icon to sort the product list in ascending order by product name
- Click the up arrow icon to sort the product list in descending order by product name
- Status: Active or Inactive
- By default, products will be in inactive mode (red circle with white 'x')
- Products can be activated using agent interface
- Device Id
- Click the down arrow icon to sort the product list in ascending order by Device Id
- Click the up arrow icon to sort the product list in descending order by Device Id
- Software Version
- Click the down arrow icon to sort the product list in ascending order by software version
- Click the up arrow icon to sort the product list in descending order by software version
- Connected Status
- This shows whether product is connected or not
- A red circle with a white 'x' indicates the product is not connected
- A green circle with a white checkmark indicates the product is connected
- N/A indicates that the prodcut has an inactive status
- View Button
- This navigates user to the ‘View Product Summary” page
- Delete
- This navigates users to the “Delete Product” page
- Product Name
Note
- By default, all newly uploaded products will have an “Inactive” status.