Endpoint - Settings
Overview
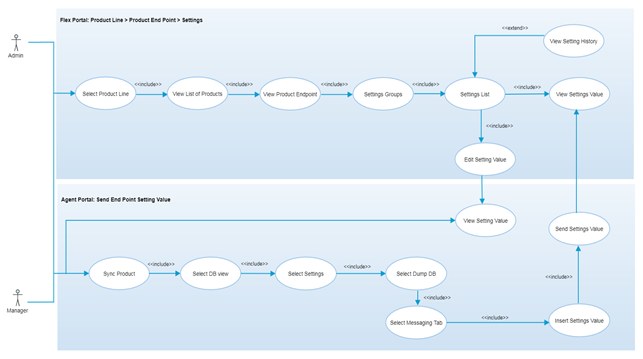
A setting is used to manage read/write values by different setting parameter type for the products. It contains two way communications that gathers the data from the endpoint and sends to the cloud, processes the data or gathers additional data from the cloud and sends back to the endpoints based on instructions they have given.
In the “Settings” tab for any endpoint, authorized users can view the group wise settings list, the current value of the settings, the setting history, and can change the setting values. Users can also send the setting value of any particular endpoint from the Agent portal. Authorized user can add settings for the dynamic endpoint and view/edit the value of the settings under this endpoint settings section. Endpoint settings are required to view and edit the settings value.
Step-by-Step Process
Step 1 – Endpoint Settings
- After selecting the product line, click the “Endpoints” button for any product from the list
- Users can view the list of endpoints added to that product
- Click on the desired endpoint from the endpoints list
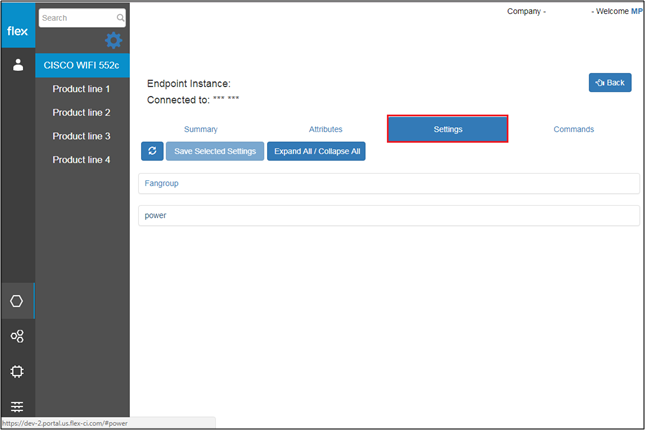
- Select the “Settings” tab to view the list of groups (of settings)
- Users can view corresponding setting list by clicking on any group
- Each setting will contain below details:
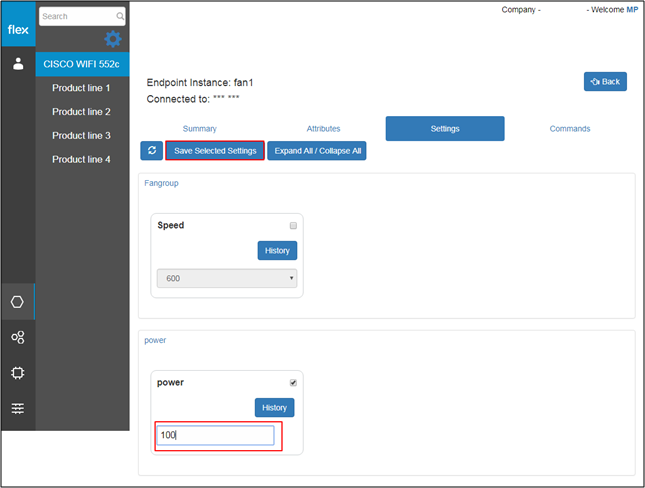
- Settings name
- Default Value
- Click the checkbox to change the default value
- Insert/Edit the default value in textbox
- Click the “Save Selected Settings” button
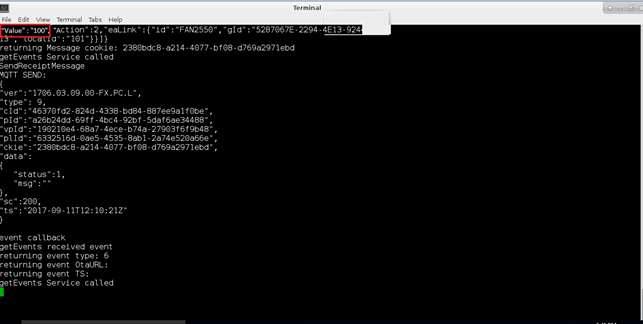
- The system will notify the user with a success or error message
- If a success message appears, users can view the setting’s value from the agent portal and its terminal
- The system will notify the user with a success or error message
- History Button
- Here, users can view the settings history.
- A pop-up will appear, containing the following history details:
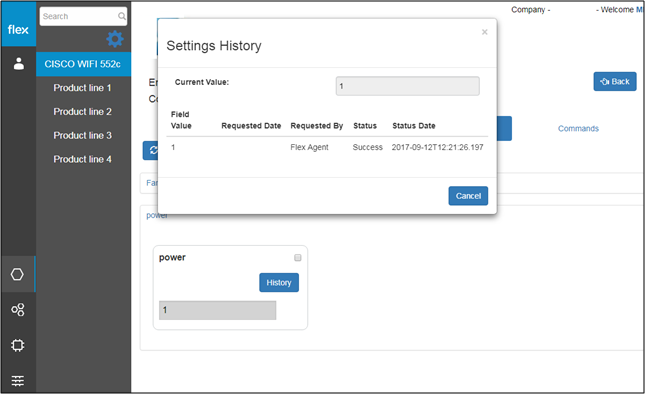
- History Button
- Current Value
- Field Value
- Requested Date Time Stamp
- Time Stamp on which system has requested for this settings
- Accepted Date Time Stamp
- Time stamp on which system has accepted this command request.
- Confirmed status – Yes or No
- Created by Name (User name)
- Click the "Cancel" button to close the pop-up
- Expand/Collapse All Button
- Click this button to expand/collapse all the groups to view their settings details
- Refresh Button
- Click the “Refresh” button to refresh the settings data
Notes
- Products must be active and connected to view the settings of the selected endpoint
- In order to send the settings value for the endpoint of any particular product from the Agent portal, users must configure the agent portal with the selected product’s device ID, serial number and CUID.
Step 2 – Send Settings Value from the Agent Portal – Sync Product
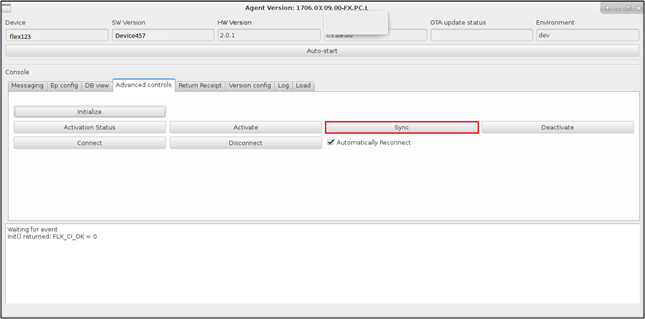
- Select the “Advanced Controls” tab from the agent portal
- Click the “Sync” button to sync the Agent portal with FlexConnect portal
- The agent portal will notify the user with a success or failure message
- If a success message occurs, users can proceed to Step 3
Notes
- Once the sync process is done, users are able to send the value of settings from the Agent portal and it can be viewed in FlexConnect portal.
Step 3 – Dump DB
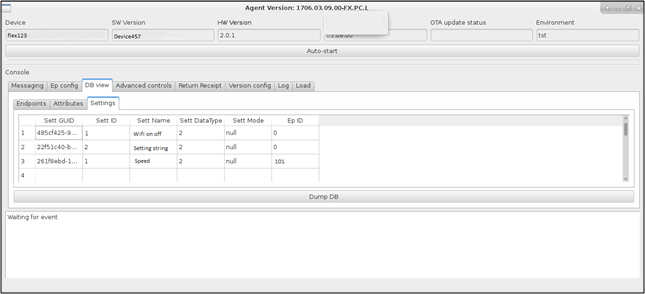
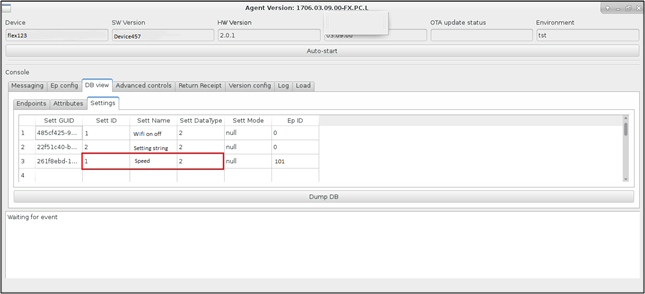
- Select the “DB View” tab from the agent portal
- Select the “Settings” tab from the DB view
- Click the “Dump DB” button
- This displays all added product settings including the following details:
- Setting GUID
- Setting ID
- Setting Name
- Setting Datatype
- Setting Mode
- Endpoint ID (in case of endpoint’s attribute)
- This displays all added product settings including the following details:
Step 4 – Set Settings Value
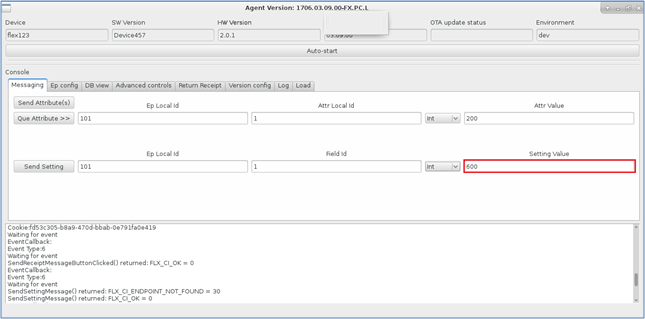
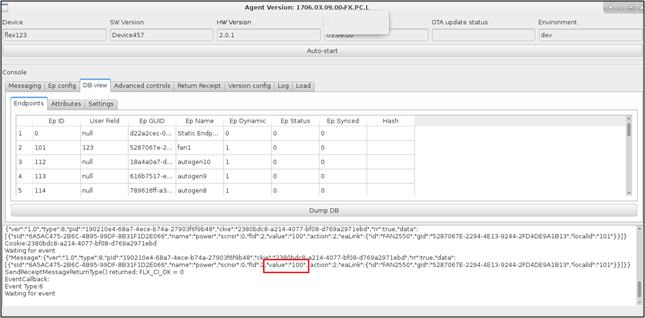
- Select the “Messaging” tab from the agent portal
- Users can see the “Send Setting” option
- Users are required to insert the following values:
Field | Type | Required? | Description |
|---|---|---|---|
EP Local Id | Text Box | No | This field requires endpoint’s unique ID. Users can see this value from the DB View>> Settings>> Ep Local Id (see below screen) |
Field Id | Text Box | Yes | This field requires the setting’s unique ID. Users can see this value from the DB View>> Settings>> Sett ID (see below screen) |
Data Type | Drop Down | Yes | This field requires the data type for the selected setting |
Setting Value | Text Box | Yes | Insert the settings value |
- Click the “Send Setting” button
- The agent portal will notify the user with a success or failure message
- If a success message occurs, users can proceed to Step 5
Step 5 – View Setting Value in FlexConnect Portal
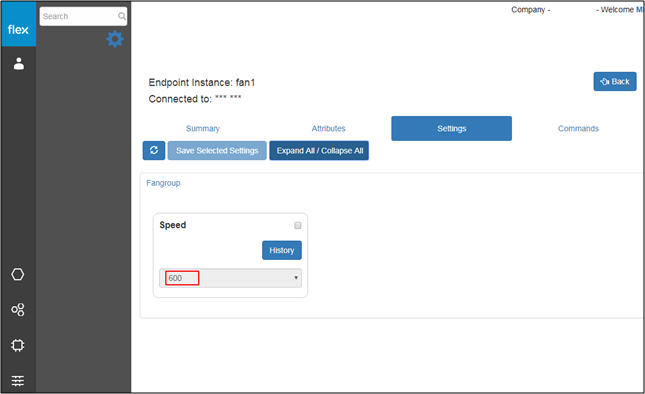
- Select the “Endpoints” button for any product from the list
- Select the desired endpoint from the endpoint list
- Select the “Settings” tab to view the value of setting
- Users can view the setting value of that particular setting entered from the agent portal