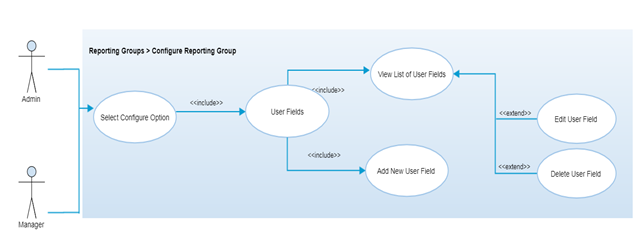
Reporting Group Configuration – User Fields
Overview
A User field is additional information about the reporting group which can be used to describe the reporting group. After configuring user fields, authorized user can add/edit these additional values for each reporting group as and when required. User fields’ definitions are generic to all reporting group.
Authorized users are able to select configure reporting group option for any reporting group and can add/edit/delete the user fields for that particular reporting group from the “User Fields” tab. The main purpose to define these user fields are that user can add additional details/additional fields about any particular reporting group as and when required.
Step-by-Step Process
Step 1 – Configure Reporting Group
- From the left navigation panel, click the
 icon to navigate to the "Configure Reporting Groups" page
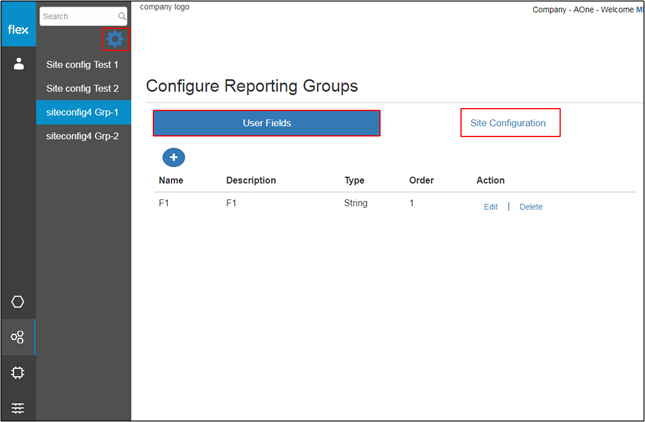
 - The "Configure Reporting Groups" page contains two tabs:
- User Fields
- This navigates users to the “Configure User Fields” page (Refer to Step 2)
- Site Configuration
- This navigates users to the “Configure Reporting Group – Site Configuration” page
- User Fields
Step 2 – Configure User Fields Tab
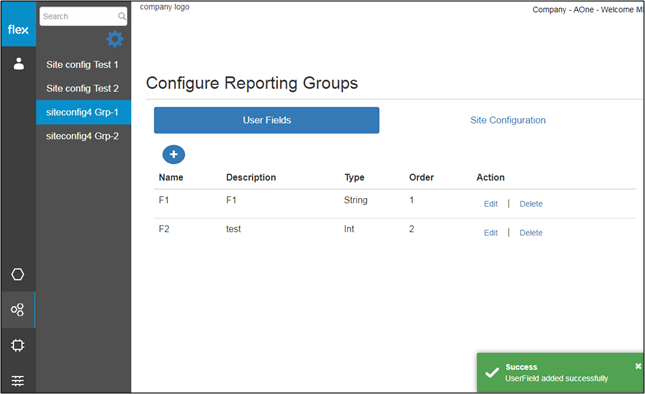
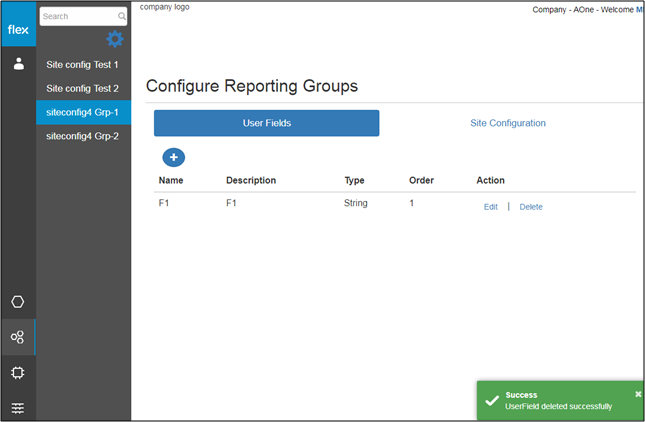
- The “User Fields” tab is selected by default when navigating to the “Configure Reporting Groups" page
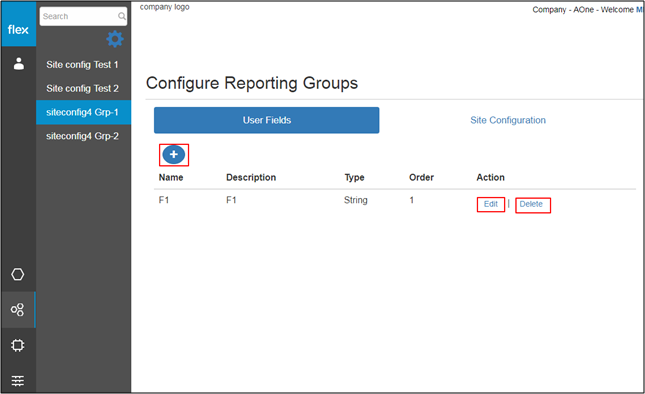
- If no user fields have been added, there will be a “No data to display” message and a “+” button
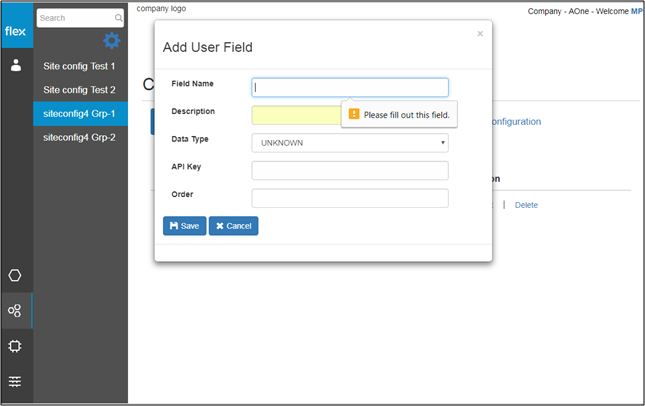
- Users can add user fields by selecting the “+” button and being redirected to the “Add User Field” page. (Refer to Step 3)
- Users will be able to view the list of already added user fields, including the following details:
- Name
- Description
- Type
- Order
- Action
- Edit
- This navigates users to the “Edit User Field” page (Refer to Step 4)
- Delete
- This navigates users to the “Delete User Field” page (Refer to Step 5)
- Edit
Step 3 – Add User Field
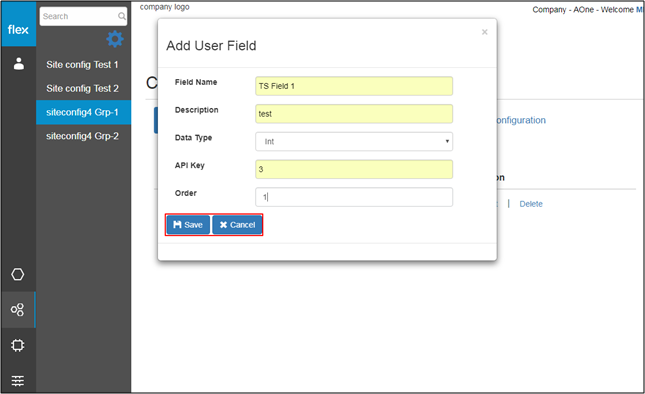
- Click the "+" button to add a user field
- Enter the following user field values into the "Add User Field" pop-up (above):
Field | Type | Required? | Description |
|---|---|---|---|
Name | Text Box | Yes | This field requires unique name for the user field for the reporting group |
Description | Text Box | No | Brief description about the user field |
Type | Drop down | Yes | It requires to select the parameter type for user field values |
API Key | Text Box | Yes | It requires API key associated with the user field. API key is unique identifier for User field. |
Order | Text Box | Yes | It requires order number. Order number is used to decide in which order this user field will be displayed in the list. |
- Click the “Cancel” button to go back without saving any information
- Click the “Save” button to save the new user field information
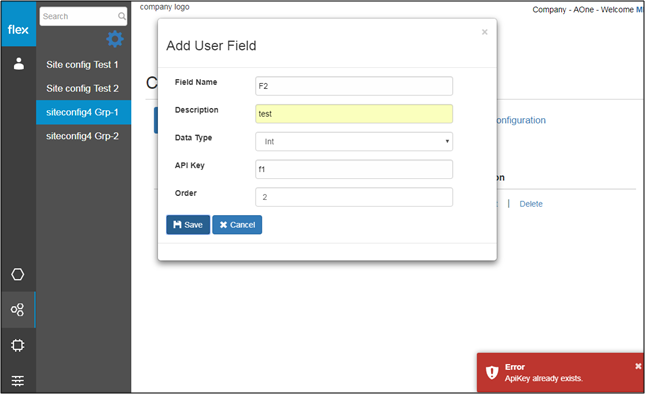
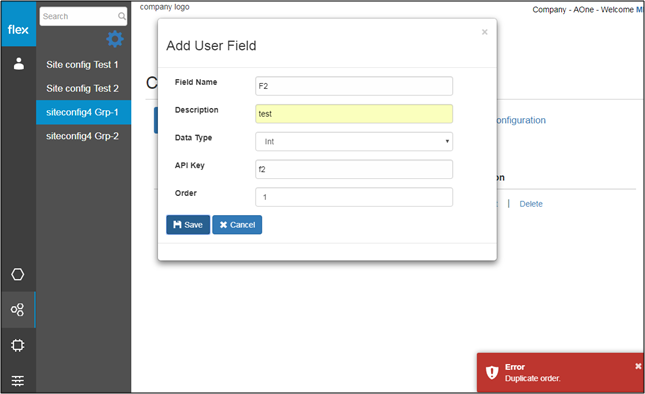
- The new user field information is validated after the user clicks the “Save” button
- If proper values are inserted into all required fields, the following will occur:
- The system will notify the user with a success message “User field Added successfully”
- The user will be redirected to the “Configure Reporting Group” page (Refer to Step 1)
- The new user field will be added to the list in the “User Field" tab
- The user will be notified with proper error messages in the event of:
- If the user needs to enter any field level information
- If the field name already exists
- If the API key already exists
- If the user enters a duplicate order
- If the user needs to enter any field level information

Step 4 – Edit User Field
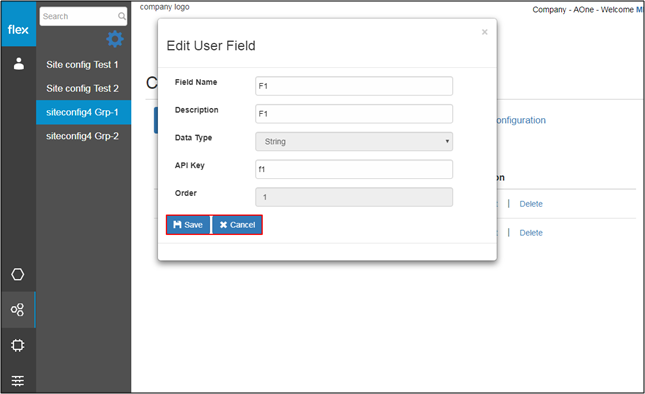
- Users can edit below details of any particular user field by clicking on “Edit” icon
- Field Name
- Name of the user field
- Description
- Description of the user field
- API key
- Field Name
- Click the “Save” button to save the edited user field values
- The system will validate the user field information and notify the user if there is an error
- Click “Cancel” to go back without editing any information
Step 5 – Delete User Field
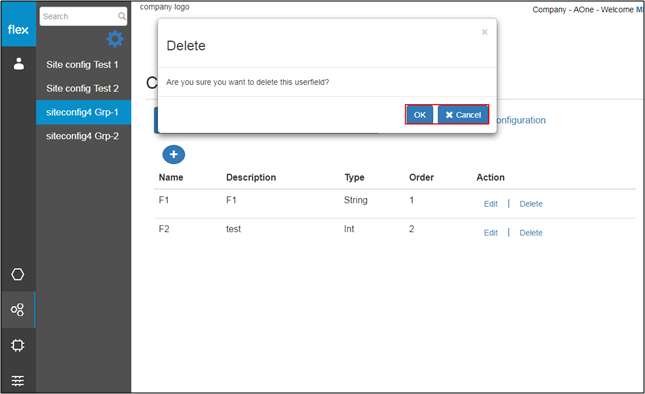
- Click “Delete” for any user field in the list
- A pop-up opens with the confirmation message
- Click “Cancel” to go back without deleting the user field
- Click “OK” to delete the user field
- The user field will be removed from the list
- The system will notify the user with a success message
- A pop-up opens with the confirmation message